Tartelettes Aux-Fruit (No-Bake) Summer Tarts

>> Friday, June 25, 2010


Tartelettes Aux-Fruit or Fruit Tarts my no-bake take on easy fresh Summer fruit tarts. These were our dessert for our Mexico vs. France World cup match dinner last week. ( Sorry I am just now posting the recipe, I have been quite busy. ) These mini tarts are super easy and relatively fast to make and some of you will appreciate the fact that you wont have to turn your oven on. I will list the fresh fruits I used but feel free to use what ever fruits are in season where you live or use any of your favorite fruits.


You will notice that one of the ingredients is whipped cream, it was homemade whipped cream. Making your own and fresh whipped cream is really what I recommend. This way you can control the sugar amounts, since the recipe calls for sweet fruits you really shouldn't have to add to much sugar because you don't want an overly sweet dessert. Also homemade will limit the amount of preservatives and therefore taste better. You will notice on the photo little black dots, that's the Bourbon Vanilla I added. Let me tell you that was such a great addition, the taste was just perfect with the fruit.


Since I made these ahead of time and they wouldn't be eaten for a few hours I wanted to give my whipped cream a little help keeping firm. So I used this product by Dr. Oetker which basically is cornstarch and a little sugar to keep the cream light and fluffy longer. (I believe in North America it's called Whip It! )


Your ingredients :
(yields 6 mini tarts)
1/2 cup or 110 ml Whipping Cream ( 30% fat)
1/2 Tbs. Smeta Fix or Whip it
2 tsp. white sugar ( adjust to your liking)
Pinch of Bourbon Vanilla Powder
14 sweet Biscuits/Crackers about 120 grams or 4.23 Ounces
40 grams or 1.4 Ounces margarine
3 Tbs. Milk
2 Nectarines
Blueberries
4 Large Strawberries
Fresh Mint

Whisk or electric mixer
rolling pin
large plastic bag
6 mini tart molds
6 large cupcake liners

1. First make the whipped cream then set aside in the refrigerator. In a large bowl combine the cream, sugar and vanilla and stir to combine the ingredients. Whisk or using an electric mixer whip the cream until you have airy and thick whipped cream, set aside in refrigerator.

2. Place the Biscuits/Crackers in a large plastic bag and roll the rolling pin to over the Biscuits to break up, continue until you have a fine crumb. Empty the bag on to a bowl then melt the margarine. Pour the melted margarine and the milk over the crackers and stir with a spoon or using your hands work the crumbs to wet the whole mixture. Line the tart molds with the cupcake liners, push with your fingers into shape around the inside of the molds. Then using your finger push and shape the cookie crumbs around the tart molds to shape the base. Continue until all 6 molds are completed. Place in the refrigerator for 10-15 minutes.

3. Wash and slice the apricots and strawberries into small slice and just wash the blueberries. Using a tablespoon scoop some whipped cream into each mini tart and spread around. Begin placing the fruit on top of the whipped cream. You can arrange as you like. Then scoop another small dollop on top of the fruit, next put a mint leaf or two on top of the finishing whipped cream.


Serve right away or place the Tartelettes in the refrigerator until you are ready to serve. By the way I left a couple in the refrigerator and they stayed relatively fresh for 3 days.
Read more...

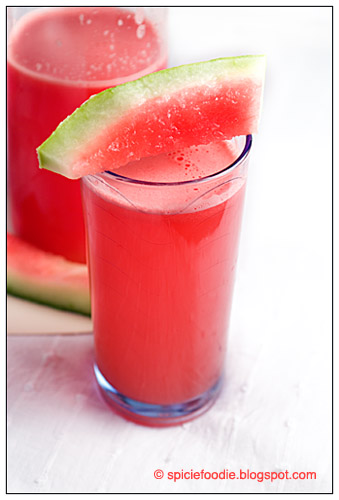
Agua de Sandia -Mexican Watermelon Water

>> Wednesday, June 23, 2010


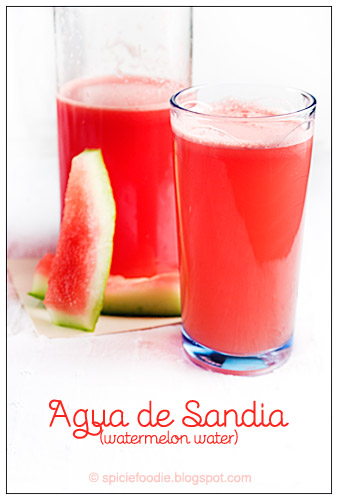
Agua de Sandia in Spanish literally translates to Watermelon water. Agua de Sandia is a flavor of Mexican beverages called aguas frescas (fresh waters) . These are beverages made of several ingredients or flavors including fruits, like watermelon, cantaloupe melon, cucumber, lime, strawberries, papaya, guava, tamarind and the list goes on. Nuts, seeds and grains can also be used for example, rice, almonds and barley. There is also one made with hibiscus flowers called agua de Jamaica, one of my favorites. The traditional recipes are very simple the ingredients are blended, water is added and some sugar can also be added to slightly sweeten the drinks.

Mexicans love agua frescas with our meals, they act as a cooling drink to compliment Mexican cuisine. They can also help tone down the burning in your mouth from the spiciness of the dishes, ( at least that is what I've experienced). If you walk into a Mexican restaurant or go to Mexico you will see huge glass containers with all the different flavors available. No matter what flavor you choose it will also be a great way to cool off in the summer heat. They are not sweet like soft drinks and are mostly water content from the fruits so they will actually leave your body feeling refreshed and re-hydrated. These are also perfect for Vegans, Vegetarians and those following a raw diet. I should also mention that they will also be much lower in calories and full of vitamins and antioxidants as compared to soft drinks or other sugary drinks which are full of love-handle growing ingredients and preservatives (E numbers), yuck!


* Please note this is a small recipe enough for 6 servings. But it can easily be doubled or tripled to fit your needs. *
Your Ingredients:
1/4 fresh watermelon ( with rind weight 2.5 lb. or 1.13 kilo - without rind 1.1 lb. or 500 grams)
3 cups or 750 ml cold water
The juice from 1 large lime
3 Tbs. granulated white sugar ( adjust to your taste)

Large Pitcher

Blender
Strainer
Ice cubes (optional)

1. Remove the rind and cut watermelon into cubes. Taste the watermelon to see how sweet it is and to get an idea of how much sugar you will need. Place the watermelon in a blender with half the water ( if you have a small blender you may need to do this in batches.) Blend the watermelon until it has completely broken down including the seeds if there are any. Or if you are concerned about the black seeds you can try to pick them out beforehand.

2. Pour the juice of 1 large lemon and the sugar into the pitcher, then place the strainer on top. Gently pour the watermelon water into the pitcher passing it through the strainer. Then add the rest of the water to the pitcher and stir until all ingredients are well incorporated.

It's best to allow the water to sit a bit before you serve it , so place inside the refrigerator or cover and leave on the counter for at least 30 minutes. When you are ready to server you can add a couple of ice cubes to each glass or just serve and enjoy.


The Agua de Sandia will really only keep fresh for one day, it looses it taste and a bit of the color the next day. This recipe can be tweaked and adjusted as you like. By adjusting the sugar amount and even the water amount depending on how juicy the watermelon is.


I hope you try this Agua de Sandia or any other flavor from a local Mexican restaurant very soon ! But just a tip for you, agua frescas never have ice crushed or blended in the mix they are not overly sweetened and are always made with seasonal fruit or fresh grains. If you see it different than I've told you, run .... OK you don't have to run, but don't drink it , it isn't an agua fresca!

*If you are interested in my other recipes for aguas frescas see my cucumber or agua de pepino. *

Read more...

Tostadas de Tinga made with Chicken

>> Friday, June 18, 2010

Mexican; tostadas; tinga; chicken; no frying; healthier version; healthy; recipes; food; cuisine; cooking; corn; cripsy breads; spicy; cabbage; onion; garlic; stewed tomatoes; chipotle peppers; smoked jalapenos; food; recipe; cooking; Cuisine; spicy; hot; traditional; typical Mexican dishes; green; el tri; World cup; Mexico vs. France; Mexicans beat France


Let me first start of by saying.... GOOOOOOOOOOOOOOOOOOLLLLLLLLLLLLLLLLLLLLLLLLLLLLLLLLLL!!!! MEXICO , MEXICO,MEXICO,MEXICO!!!! LOL In case you are wondering what this is all about, Mexico schooled ( 2- 0 baby) France last night in their World Cup match, it was a great and very exciting game. Both goals had me jumping up and cheering - loudly! Sorry my "Frenchie" friends that you lost so bad, But I will root for you next game - as long as it isn't against Mexico of course.

Well moving on to the food, again to cheer on and celebrate another World Cup match FDG came over for dinner and I cooked foods to represent both countries. For Mexico I made Chicken Tinga Tostadas as the main course and to represent France and for dessert I made Tartelletes aux fruit. To drink I made Agua de Sandia or Watermelon water, which is an agua fresca or "fresh water" which are drinks made from fresh juicy fruits. But I will first give you the recipe for the Chicken Tinga Tostadas and the others to follow soon , ( I haven't forgotten about the previous match foods, recipes are coming for those too. )

What is a Tostada you ask? Tostada is Spanish for toasted , which depending on the Latin American country or Spain it can mean a slice of toasted bread, a fried plantain or a toasted corn tortilla. I'm talking about the Mexican Tostada, which is a corn tortilla that has been toasted or fried and topped with all sorts of ingredients. It can be as simple as spreading beans or maybe just crema and salsa to ones I like to call "loaded" topped with beans, meats , vegetables, salsas and chiles - we are talking a big satisfying meal. Today I am showing you Tostadas de Tinga made with Chicken. Tinga means ..... hmm mm.... well I'm a little embarrassed because I don't actually know exactly what the word means. But what is it?, that I can tell you. It is a very spicy stewed meat (either pork or chicken) that is made using the taste bud awakening smoky "ay mama, que picoso" Chipotle peppers. Chipotle peppers are Jalapenos that have been smoked to dry them. The ones for the Tinga are canned chipotle peppers that are in an adobo sauce or a red sauce that is tomato, vinegar and spices. I am warning you now this is a very spicy recipe so be careful or adjust to a level of spiciness you can tolerate.

Mexican; tostadas; tinga; chicken; no frying; healthier version; healthy; recipes; food; cuisine; cooking; corn; cripsy breads; spicy; cabbage; onion; garlic; stewed tomatoes; chipotle peppers; smoked jalapenos; food; recipe; cooking; Cuisine; spicy; hot; traditional; typical Mexican dishes; green; el tri; World cup; Mexico vs. France; Mexicans beat France

First let me tell you how to make the tostada, there are two methods 1. frying the tortilla or 2. Baking it , my preferred way because it's healthier and lower in calories. Since I make my own tortillas I made sure they were thinner than usual so they would be crunchy and not to hard. If you are buying commercial tortillas you make have to adjust the baking time a bit.

Mexican; tostadas; tinga; chicken; no frying; healthier version; healthy; recipes; food; cuisine; cooking; corn; cripsy breads; spicy; cabbage; onion; garlic; stewed tomatoes; chipotle peppers; smoked jalapenos; food; recipe; cooking; Cuisine; spicy; hot; traditional; typical Mexican dishes; green; el tri; World cup; Mexico vs. France; Mexicans beat FranceYour Ingredients:

12 corn tortillas or tostadas
7 ounces or 200 grams canned Chipotle peppers en Adobo(or 5 )
5 ounces or 140 grams stewed tomatoes
10.5 ounces or 300 grams shredded chicken
14 ounces or 400 grams shredded cabbage
About 2 cups of refried beans
1 large yellow onion, finely chopped
2 garlic cloves, minced
salt to taste
1 tbs. Corn oil or Sunflower oil

Optional Garnishes:
Crumbled cheese
Mexican sour cream
Avocado slices


Mexican; tostadas; tinga; chicken; no frying; healthier version; healthy; recipes; food; cuisine; cooking; corn; cripsy breads; spicy; cabbage; onion; garlic; stewed tomatoes; chipotle peppers; smoked jalapenos; food; recipe; cooking; Cuisine; spicy; hot; traditional; typical Mexican dishes; green; el tri; World cup; Mexico vs. France; Mexicans beat France
1. Preheat oven to 225C or 435F . Place the Chipotle peppers and the stewed tomatoes in a blender with a pinch of salt and blend until it is a smooth sauce, set aside. Next shred the cabbage and chop the onion and mince the garlic. Heat the oil in a large pan, then add onion frying until it is translucent then add the garlic and fry for another 4 minutes. Next add the shredded cabbage to the pan , stir well to coat with the bit of oil. Cover and let the cabbage cook until it is slightly browned and translucent . This may take 15- 20 minutes, check on it so as not to let it burn.

2. Place a few tortillas at a time either directly on the oven rack or on a baking sheet ( I used the oven rack.) Close the oven door and allow each tortilla to bake for 3-5 minutes on each side, depending on the thickness of the tortilla. It should be crisp all the way through and not soft in the center. Once baked stack on a cooling rack or a plate. Continue repeating step 2 until all of the tortillas are baked or made into tostadas.

3. Once the tostadas are made and the cabbage has cooked through, add the chicken to the cabbage mixture and combine well. Next pour the Chipotle tomato mixture and stir the Tinga until it is well combined. If it looks a bit dry you can add a bit of stock or water. Cover and simmer for 10 minutes or until you are ready to serve.

To assemble the Tostadas:
Grab one tostada and spread some refried beans until it is well covered. Then spread the Tinga on top of the beans. It can be enjoyed liked this or at this time you may add any of the suggested garnishes/toppings. (* The amount or height of the tostadas depends on how much you of the ingredients would like to use. *)
Serve right away so the tostada doesn't become soggy.

How to eat:
Wash those hands well and get ready.... Pick up the tostada and take a big bite, delicioso! Be careful as they can be a bit messy until you get practice eating them. If you absolutely oppose to using your hands go ahead and grab a fork and spoon, we won't judge.

Wash it down with Agua de Sandia (recipe coming soon)


Finish with a Tartellete aux fruit (recipe can be found here)


An enthusiastic sports commentator from Czech TV who showed up ready to support Mexico wearing a Sombrero and poncho, ¡Ajúa!

Read more...

England vs. USA with food to celebrate

>> Wednesday, June 9, 2010

Saturday England played against the USA in the World Cup. To celebrate our friend FDG (Frequent Dinner Guest) , who is English, came over for dinner and I cooked a dinner to represent both nations. Since I was going to have to cook to separate dishes I tried to keep it as simple as possible both because of time and so I wouldn't have to run around hunting ingredients. So the dishes I choose to cook were Hamburgers for the Americans (of course) and individual servings Shepherd's Pie for England. Shepherd's pie is traditionally made with ground lamb and if it is cooked with ground (minced) beef it is called Cottage pie. Well that's at least what I thought and read on several sites. But our friend FDG is English and he said that his Mum called it Shepherd's pie, so that's what I'll call it. I'll have a recipe for the Shepherd's pie soon in another post, in the meantime just enjoy the photos. Wait till you see what FDG brought for dessert ( representing a neutral country ) .....


And now for the dessert that stole the spotlight, Fresh homemade Tiramisu made by FDG and let me tell you this Tiramisu was one of the best Tiramisu I've ever had!


It was creamy, lightly sweetened with a hint of the alcohol but it did not over power the other flavors whatsoever.


The cake he used was spongy and soaked up the alcohol very nicely without becoming to soggy ( which I hate). He based the Tiramisu on Gordon Ramsey's recipe but made some delicious adjustments to the recipe. Who knew he was such a great cook, He can bring dessert any time :)
England and the USA may have tied the game but our "neutral" dessert won the diner spotlight!

I also have these beautiful paintings that I found on Vanity Fair 's site. They have a long article about the 2010 World Cup teams and along with the article are murals for the competing teams. The murals were created for ESPN by the AM I COLLECTIVE a group of artists based in South Africa. Truly magnificent works of art that you must take a look at , even if you are not a Football (Soccer) fan. Of course Mexico's is on the top of my list.

Mexico: El Tri (The Three-Colored)

USA: The Yanks (for my American husband)


England: The Three Lions (for our friend FDG , including "Shrek" lol)
To see all 32 beautiful murals visit Vanity Fair here.

Read more...

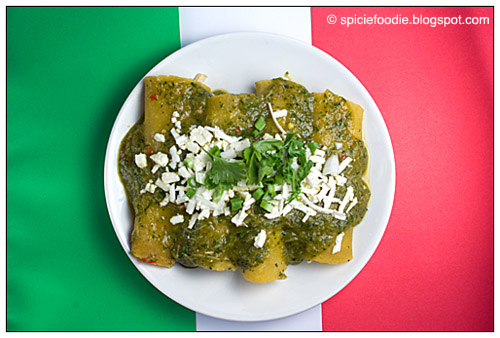
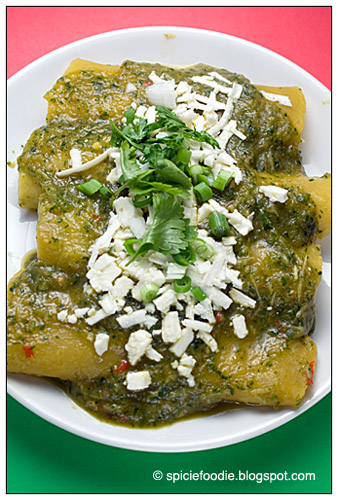
World Cup and Enchiladas Verdes (My Way)

Hey did you hear the 2010 World Cup ( Football , to Americans I mean Soccer) tournament starts tomorrow in South Africa? Well of course you have, that is unless you live in a cave or have no connection to the outside world, ha ha just kidding. OK if you are not a fan of Football / Soccer than you probably wouldn't know, but it's hard to block out the constant bombardment of promotion. Either way the tournament is being kicked off the host country ,South Africa, against my birth country Mexico! (Now you know why I'm paying attention) Alright I have to admit I'm not big on Football, I don't know much about it and I don't follow it (Hockey is my game), but I think it's good to root or support our own country's teams.

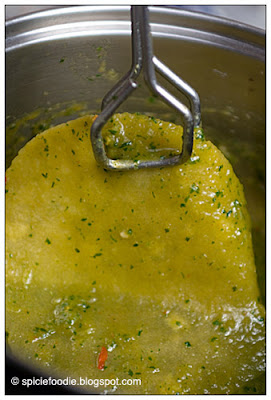
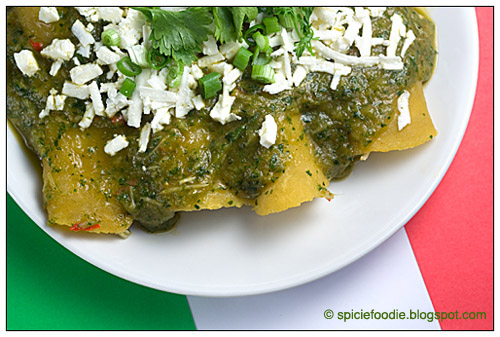
To show my support for Mexico I made Enchiladas Verdes (green enchiladas) . Now these are not the real traditional enchiladas as some of you may know them. The reason being of course because I cannot find tomatillos or green chilies that normally go into these enchiladas. So this recipe is enchiladas verdes - my way, using substitute ingredients to get it as close as possible. For those of you that don't know what an enchilada is, it's a corn tortillas dipped in sauce then stuffed with meat or vegetables then rolled up and topped with more sauce. There are several varieties with different sauces but I think outside of Mexico the two most popular types are the Enchiladas Rojas (in a red sauce) and the Enchiladas Verdes(green). If you are interested in traditional recipe for the Rojas you can find my recipe in my archive here.

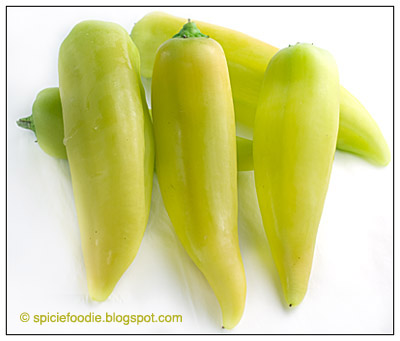
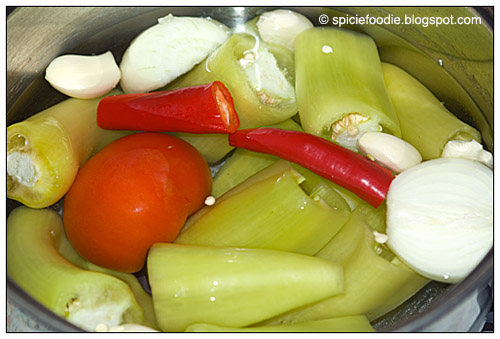
These are banana peppers similar to wax peppers, they are my substitute for green chilies in the recipe.


Your Ingredients:

Chicken filling:
2 Chicken breast boiled and shredded ( or 3 boiled chicken thighs, the total meat should be 250 grams / a little over 1/2 lb. )
12 corn tortillas
corn oil or sunflower for shallow frying

Enchilada sauce:
7 green wax peppers/ banana peppers (420 grams / just under 1 lb.)
1 medium yellow onion
5 garlic cloves
1 spicy red chili pepper (Holland pepper)
1 medium tomato

Handful of fresh cilantro leaf
1 chicken bouillon cube (low-sodium)
1/2 tsp. Salt
1/4 tsp. black pepper

Toppings:
Crumbled Queso Fresco ( Feta makes a good substitute)
Finely chopped onion
cilantro


1. Peel the garlic cloves and onions, also cut the onion in half. Remove the stem and seeds from the green peppers, then cut all in half. Remove the stem from the red chili and if you want a more mild sauce remove the seeds as well otherwise leave as is, cut pepper in half. Remove the stem from the tomato , then place everything in a large pot and cover with water. Boil the vegetables for 15-20 minutes or until everything is soft. Drain and allow to cool for a few minutes.

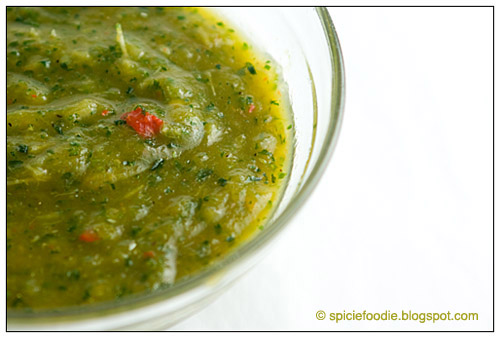
2. Prepare the cilantro by cutting the top quarter including the leafs and a bit of the stem. Place the boiled vegetables inside a blender container then add the cilantro,salt,bouillon and black pepper. Puree until you have a creamy thick sauce without any chunks. (If you have a small blender you may need to puree the peppers in a couple of batches. )

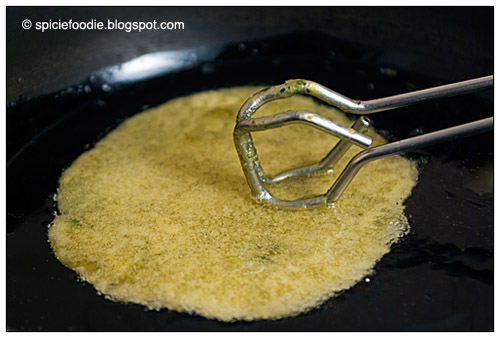
3. Pour a couple of spoonfuls of the sauce over the shredded chicken and stir to mix the sauce into the chicken. In a large frying pan heat about 1/2 cup of oil, place the sauce in a large pot or large bowl for dipping the tortillas. You'll also need thongs, a plate with paper towels and a spare plate or cutting board to roll and prepare the enchiladas.

First take one tortilla, dip it into the oil and cook on each side for 2 min. each. This is to soften the tortilla and it will help the sauce stick better on the tortilla.
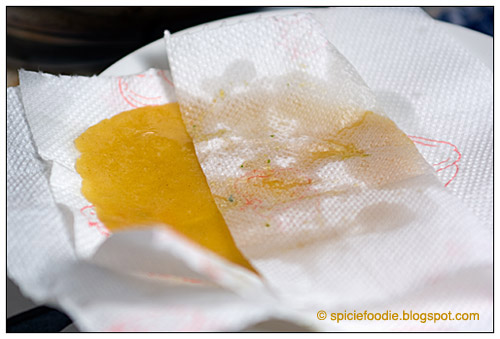
Next dry off some of the extra oil,


then dip and cover completely on both sides with the sauce. Don't worry if you feel there isn't enough sauce on the tortilla we'll add more at the end.


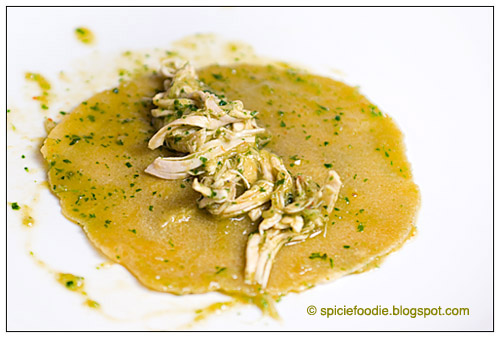
Next we add the stuffing, the chicken, in the center of the tortilla put some of the shredded chicken

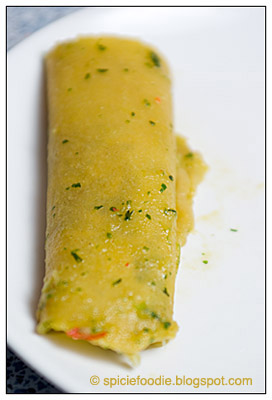
Then roll up, set aside until you are done with the batch.

4. Once you are done rolling up the enchiladas you can add more sauce on top, then you can add the rest of the toppings if you like. Another serving suggestion is to serve Mexican rice and some refried beans on the side. Or make a simple salad by shredding iceberg lettuce , sliced radishes , some crumbled cheese and some Crema fresca, ( substitute with creme fresh) .


If you need to also make your own corn tortillas, I also have a recipe again using substitute ingredients. But don't worry because both of the corn tortillas and enchiladas turn out great and tasty. May not be the "real" thing but the substitutes have helped me satisfy those cravings that leave me homesick. The enchiladas were only a little bit spicy and full of flavor, the banana peppers worked great. I had leftover sauce and used it as a salsa topping for chicken tacos, again it worked great. Please check the archives if you need recipes for the tortillas and refried beans (mine are low-fat and not fried) . Buen Provecho!

Read more...

Homemade Almond Milk ( Raw )

>> Monday, June 7, 2010

almond milk recipe; glass; jar; almond milk; recipe; healthy; almonds; whole almond; brown; white; creamy; vertical; drink; vegan; vegetarian; gluten free; gluten free drinks; how to make almond milk; no separate; no curdeling; stop from seperating; how to; how to blanch almonds; spicie foodie; non-dairy; non-dairy milk; cooked; raw; sweet; cooking; baking; fresh; home made; homemade,
Almond milk is a beverage made from finely ground almonds and water. Almond milk is a milk substitute used by those either lactose intolerant, vegans and vegetarians as well as by people who follow a raw food diet. I am neither of these I just like almond milk for it's taste and to use as a fun substitute ingredient to cow milk or soy milk. This nut milk has been popular since Medieval times throughout Europe and the Middle East. The popularity during Medieval times was mainly because almond milk keeps longer than cow's milk.

This light yet creamy milk does not only taste good it is also nutritious. To those of us who do not have a nut allergy we can benefit from the Vitamin E,Vitamin A, Zinc,Magnesium, Iron, Calcium, No Cholesterol ,lactose free, people with soy allergies can use it as an alternative, and Low Saturated Fat. Homemade almond milk is better than prepackage because prepackage usually has sweeteners and preservatives. Though some companies do add in vitamins and minerals to try to make it comparable to cow's milk, you may want to read the package carefully if you choose to buy prepackaged. But before completely switching to almond milk only you may want to do more research and definitely speak with your Doctor to see if this would be a good alternative for your body's needs.

almond milk recipe; glass; jar; almond milk; recipe; healthy; almonds; whole almond; brown; white; creamy; vertical; drink; vegan; vegetarian; gluten free; gluten free drinks; how to make almond milk; no separate; no curdeling; stop from seperating; how to; how to blanch almonds; spicie foodie; non-dairy; non-dairy milk; cooked; raw; sweet; cooking; baking; fresh; home made; homemade,
Almond milk can be used as a substitute in the same way you would soy milk or regular milk. The only instance where almond milk would not work too well would be in baking when the recipe is for fatty or buttery baked goods. If you are following a raw food diet this recipe is one you'll love, no cooking involved. And a tip to you about some to the prepackage almond milk , some companies actually use roasted almonds and not raw, so read those packages. This recipe is a small recipe that can easily be doubled or tripled for your needs.

almond milk recipe; glass; jar; almond milk; recipe; healthy; almonds; whole almond; brown; white; creamy; vertical; drink; vegan; vegetarian; gluten free; gluten free drinks; how to make almond milk; no separate; no curdeling; stop from seperating; how to; how to blanch almonds; spicie foodie; non-dairy; non-dairy milk; cooked; raw; sweet; cooking; baking; fresh; home made; homemade, almond meal,almond flour


Your Ingredients:
-100 grams or 3.5 ounces blanched almonds
-2 cups or 500 ml water

optional:
sugar or honey or dates to sweeten

-1 large pot or bowl
-cheese cloth or a clean kitchen towel or very fine sieve colander
-blender

1. Place the blanched almonds in a large bowl and cover with water. Leave to sit overnight.

2. Drain the water, and place the almonds in a blender. Pour 1 cup of water into blender, and if using sweetener add it to the blender as well. Blend until the almonds have completely broken down to a fine almost paste.

3. Place the cheese cloth (or other options) over a large bowl. Pour the liquid over the cloth, then pull up on all ends to squeeze out liquid on the bowl.

4.Once the liquid is all removed, place the ground almonds back inside the blender and add the remaining 1 cup of water. Again repeating step #3.

Done and ready to enjoy the Almond milk. Serve or use the almond milk straight away or store in the refrigerator until you are ready to use ( it will keep fresh for 5 days). The milk will separate a bit while it sits, just give it a quick stir or shake and it's ready.
almond milk recipe; glass; jar; almond milk; recipe; healthy; almonds; whole almond; brown; white; creamy; vertical; drink; vegan; vegetarian; gluten free; gluten free drinks; how to make almond milk; no separate; no curdeling; stop from seperating; how to; how to blanch almonds; spicie foodie; non-dairy; non-dairy milk; cooked; raw; sweet; cooking; baking; fresh; home made; homemade,
Don't discard the ground almonds you can use them in baked goods. An option is to dry the ground almonds then once they have completely dried place them back in the blender and blend into a fine almond flour. Again this can be used in baked goods or any other recipes that might call for almond flour. It works great I have a recipe to share using the leftover almond flour, coming soon.

almond milk recipe; glass; jar; almond milk; recipe; healthy; almonds; whole almond; brown; white; creamy; vertical; drink; vegan; vegetarian; gluten free; gluten free drinks; how to make almond milk; no separate; no curdeling; stop from seperating; how to; how to blanch almonds; spicie foodie; non-dairy; non-dairy milk; cooked; raw; sweet; cooking; baking; fresh; home made; homemade, ** For my Homemade Non Separating Almond Milk recipe click here.**

Read more...

Emeril's Crab Cakes with Avocado Emulsion

>> Friday, June 4, 2010

Today I am doing another recipe review that is an amazing mouth watering recipe belonging to a world famous Chef, Emeril Lagasse. Emeril is a celebrity chef in the US with a TV show, many books, restaurants around the US and has merchandise collection for sale. He is know for his Cajun,Creole and Portuguese cuisine. If you are not familiar with him you should really check him out, he is an amazing Chef. We have actually used this recipe a couple of times and both times it has resulted with heavenly results. Crab cakes are a popular American dish with unique recipes from the different American coastal crabbing industries. Crab cakes are not only popular in those areas, they are also to be found in an assortment of restaurants in the US. My husband and I searched and looked at several different recipes from different regions, but this is the one that appealed most to the both of us.

The recipe calls for fresh crab meat picked over from the shells and cartilage. Being that we are currently living in a land-locked country we won't be finding fresh crabs anytime soon. I have never seen fresh crab (nor Lobster) for sale at any of the local stores. Luckily we have found canned crab meat and have used it as a substitute. One time we were very lucky to have found canned Grade-A Russian king crab meat, which was just perfect and at a bargain price. This last time we weren't so lucky, we could only find Thai crab meat that was lower grade and smaller shredded pieces, but nonetheless worked just fine.

The only thing I changed from the recipe is that I allowed the crab meat to sit overnight before adding the breadcrumbs and frying. I'm glad I did this because it really allowed the crab meat to pick up the flavors from the spices. It is your choice if you want to do as I did or just follow the recipe as is.

One of the suggested sides to serve these heavenly crab cakes is Emeril's Cilantro-Avocado Emulsion. That is the creamy green sauce you see in my photos. The emulsion was so creamy, tangy and a bit spicy which went perfect with the crab cakes. I think that the flavors added or helped bring out the taste of the crab even more. Plus it gave the meal a fresh and light feeling to the fried cake. Which for me is a big plus since I'm not such a big fan of fried foods because of the greasy after taste left behind, the emulsion really took that away.

The crab cakes were light with and crispy on the outside. The inside felt soft with a burst of flavors, there were just simply scrumptious. The recipe was one of the best crab cakes ever! A Five Star rating all the way. Even though it was a bit time consuming it was well worth every second. This is a recipe that I would really suggest for a dinner party as a main dish or made into small pieces as an appetizer.

Here is the recipe for Emeril's Crispy Louisiana Crab Cakes with Cilantro-Avocado Emulsion.

Read more...

Buy or Sell Food Photos!

View My PortfolioRoyalty Free Images

Support Me By Clicking on These Links:

living in Czech Republic Expat Women - Helping Women Living OverseasTopOfBlogsBuy Foodie artHonest Cooking The Food Magazine, Spicie Foodie , contributor

Followers

©2009-2011 All recipes, articles, blog post, content, and images (*Unless otherwise stated*) are the sole property of Spicie Foodie and Nancy Lopez-McHugh. They should not be used without prior written consent. You can contact me here

  © Blogger template Webnolia by Ourblogtemplates.com 2009

Back to TOP